TRANSFERRING YOUR APP
TO YOUR
APPLE DEVELOPER ACCOUNT
Apple has asked us to submit any updates to existing apps in a Developer Account belonging to the customer (you), rather than Innovatise.
We want to keep your app up to date with new functionality, bug fixes and other changes, so we need you to create your own Developer Account. We can then transfer your app into this account and carry on managing and updating it as before.
This page describes how to do this.
The process in overview:
- You enroll with Apple for a Developer account (Apple will approve this within some days and may call you)
- Apple will email to confirm they’ve approved your enrolment. Got your enrolment email ? Click here for the next step !
- You activate and pay for the developer program fee (£79 / year). Got your payment confirmation ? Click here for the next step !
- You invite Innovatise to have an admin login to your Developer account
- You invite Innovatise to have an admin login to your iTunes Connect account. Done this ? Click here for the next step !
- We will then transfer the app into your Developer account
- You need to accept the transfer in your iTunes Connect account
What you need:
- Apple ID
If you already have an Apple ID for your organisation, you can use that.
If you do not already have an Apple ID for your organisation, you can create one here create an Apple ID here - A “DUNS” Number for your company
This number is used to identify your company in the registration form. If you are not yet familiar with your DUNS number, you can find the DUNS number here. - Authorisation
You should be authorised to sign contracts for your company.
Step 1: Start
Click on the registration URL: https://developer.apple.com/programs/enroll/
Then click “Start Your Enrollment”

Step 2: Login with Apple Id
If you have an Apple ID for your organisation you can use that. If you do not already have an Apple ID, you can create an Apple ID here create an Apple ID here

If you have set two-factor authentication for your Apple ID, please provide the code that was sent to your phone or PC.

Step 3: Accept Apple’s Terms of Service
Read and accept the Apple Terms and Conditions for the Developer Program and click “Submit”

Step 4: Join the Developer Program
Now you are logged in. On the next page, press “Join the Apple Developer Program”.

On the next page, press “Enroll”.

Now press “Start Your Enrollment” again on the page.

Step 5.1: Organization type
Select “Company / Organization”
29th August 2018 update: Recent changes by Apple mean that we cannot manage your app if you enrol as an Individual. Please make sure you enrol as an Organization.

Please read the notes and press “Continue”

Step 5.2: Organization Information
“Authority to Sign Legal Agreements”
On this page confirm if you are owner/founder (option 1) or you are otherwise authorised to sign contracts for your company (option 2).
“Organization Information”
- Legal Entity Name: Company name
- DUNS Number: DUNS Number of your company. Can be found here.
- Website: Company website
- Phone number: Apple may call this you on this number to confirm your identity.
- Email: Your email address at your company
Press “Continue”

Step 6: Confirm
Verify all entries and confirm with “Submit”

Step 7: Application Done!
Your Apple Developer Account application is now done ! Please write down your “Enrollement ID”.
What’s happening now:
- Apple is now reviewing your company data.
- Apple may contact you by phone to verify your identity and will ask you if you are authorized to sign contracts for the company. Apple may also ask for a second person / phone number in the company if you are not available. If you do not have a 2nd person / number, you can also specify that you can then be contacted by e-mail. Your developer account is then confirmed and active.
- You will receive and email confirming your application has been accepted

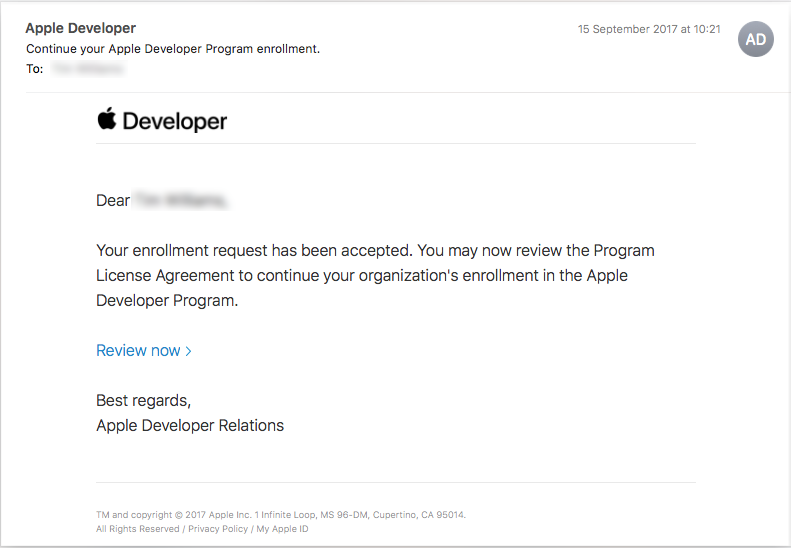
Enrollment confirmation email
Now you have to wait for Apple to approve your Enrollment. They may call you to confirm details as part of the approval.
Once you’re approved, you’ll get an email like this one below — click on Review now > to log back in to the Developer portal:
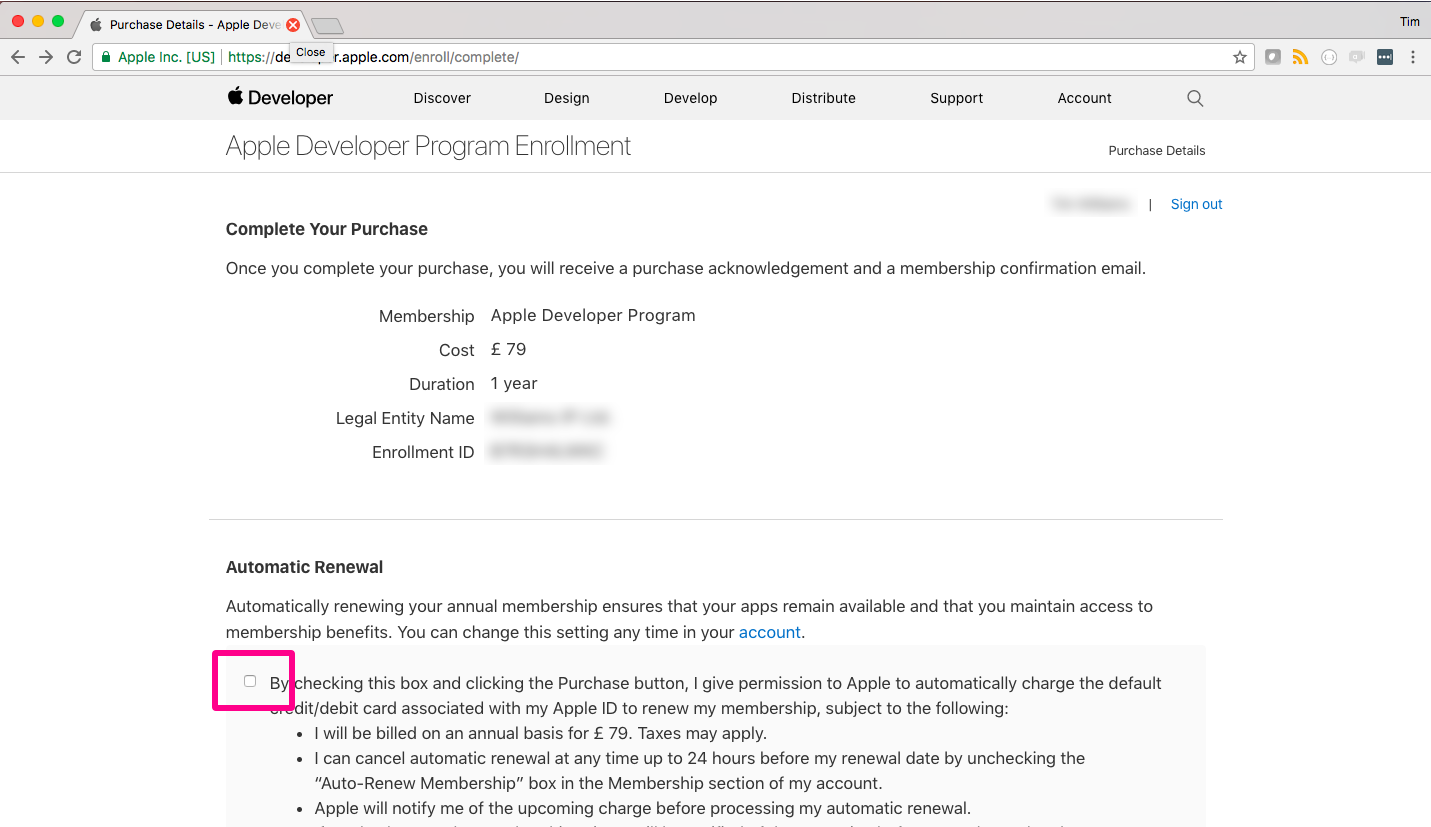
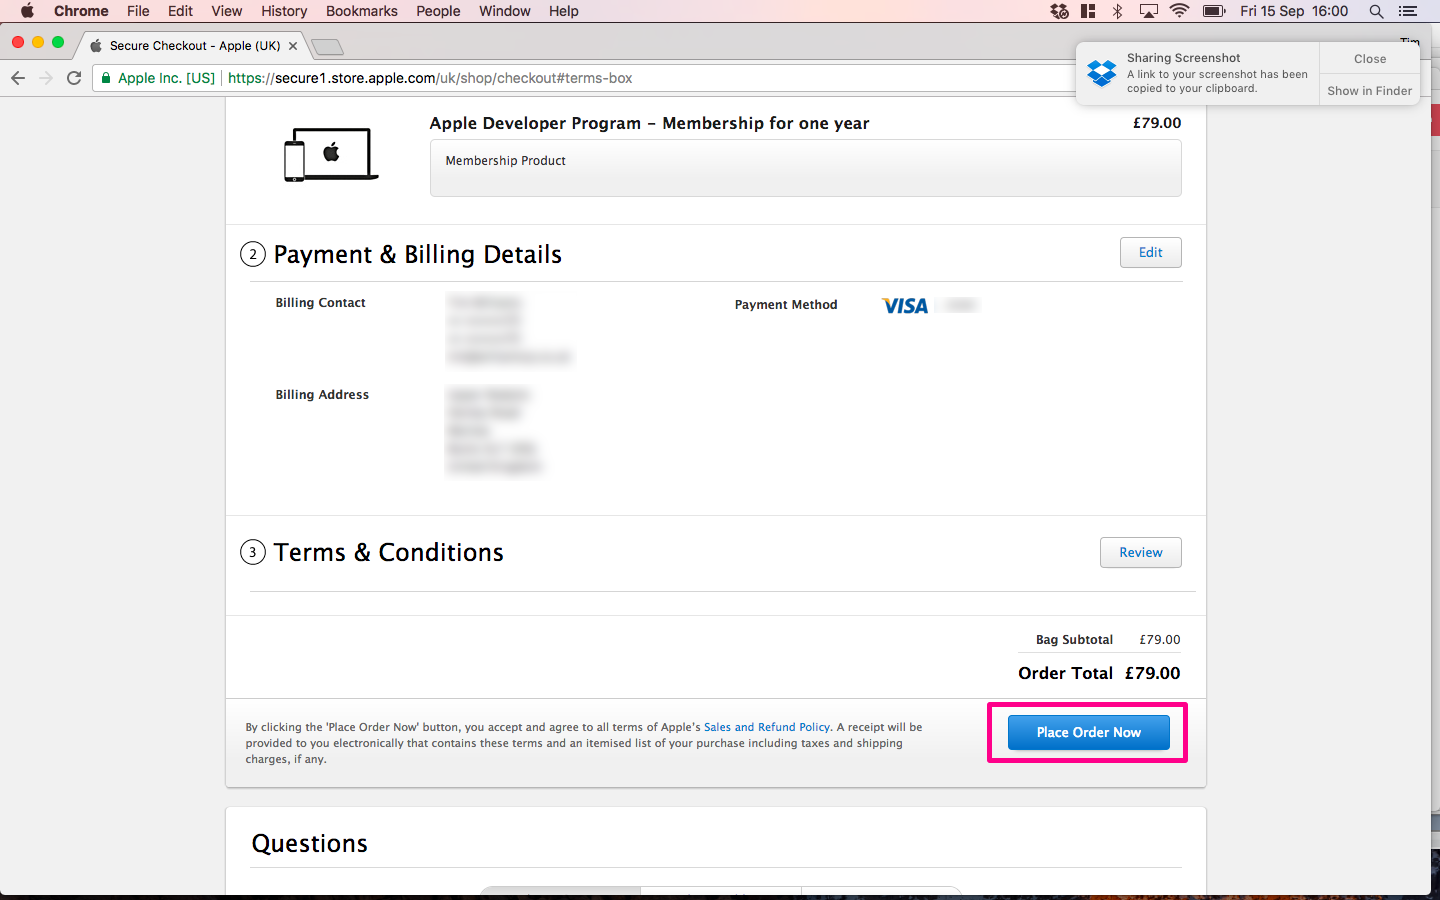
Step 8: Login and Pay
You’ll be asked to pay your annual subscription fee. Check the box to enable automatic payment:
You’ll be asked to log in again with your AppleID
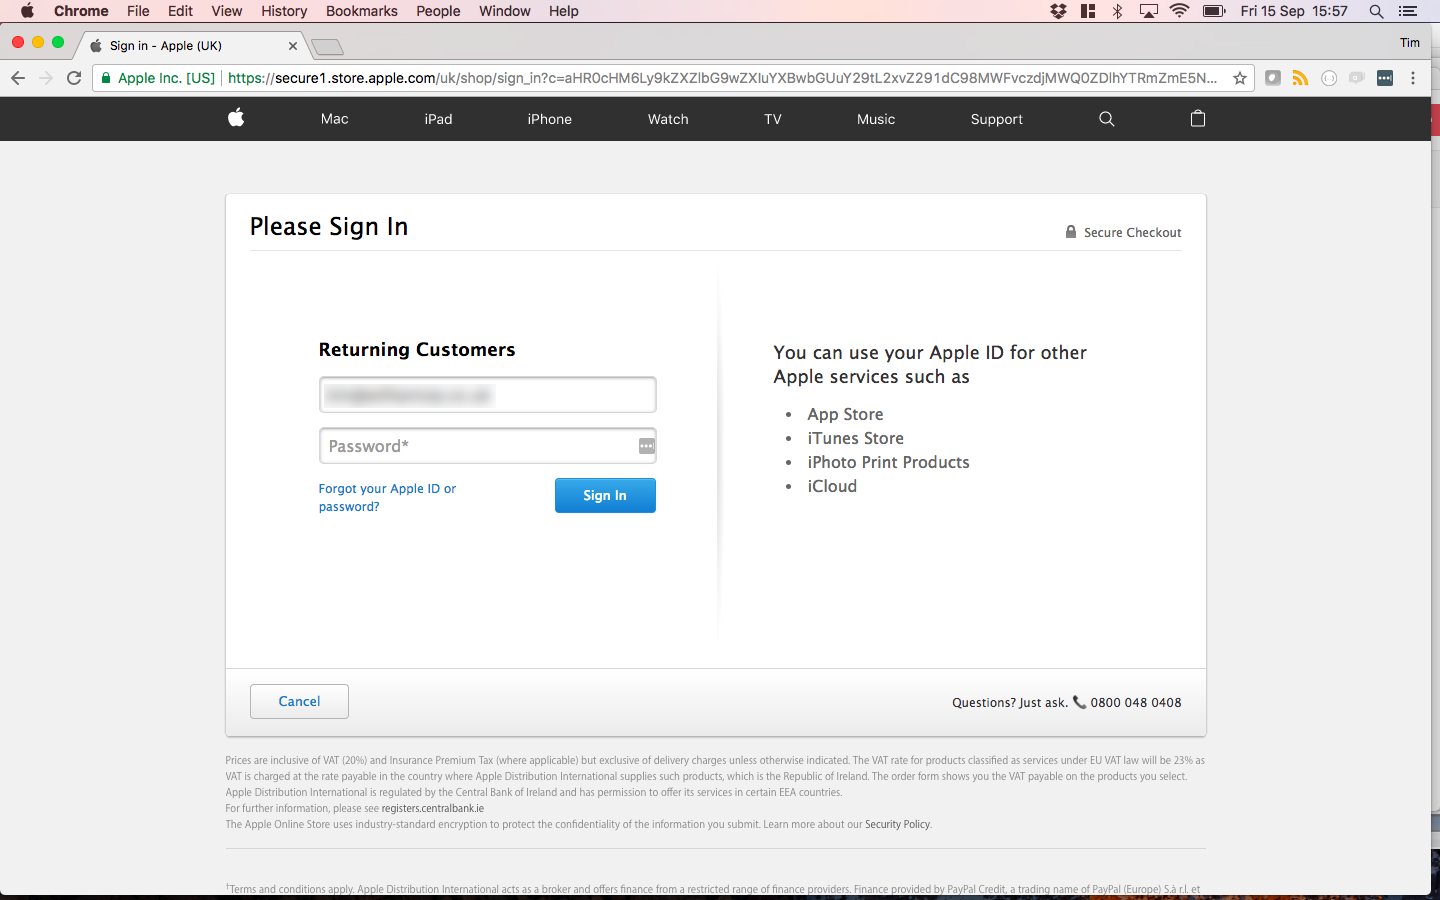
You will be asked to confirm payment, this will default to the credit card linked to your AppleID.
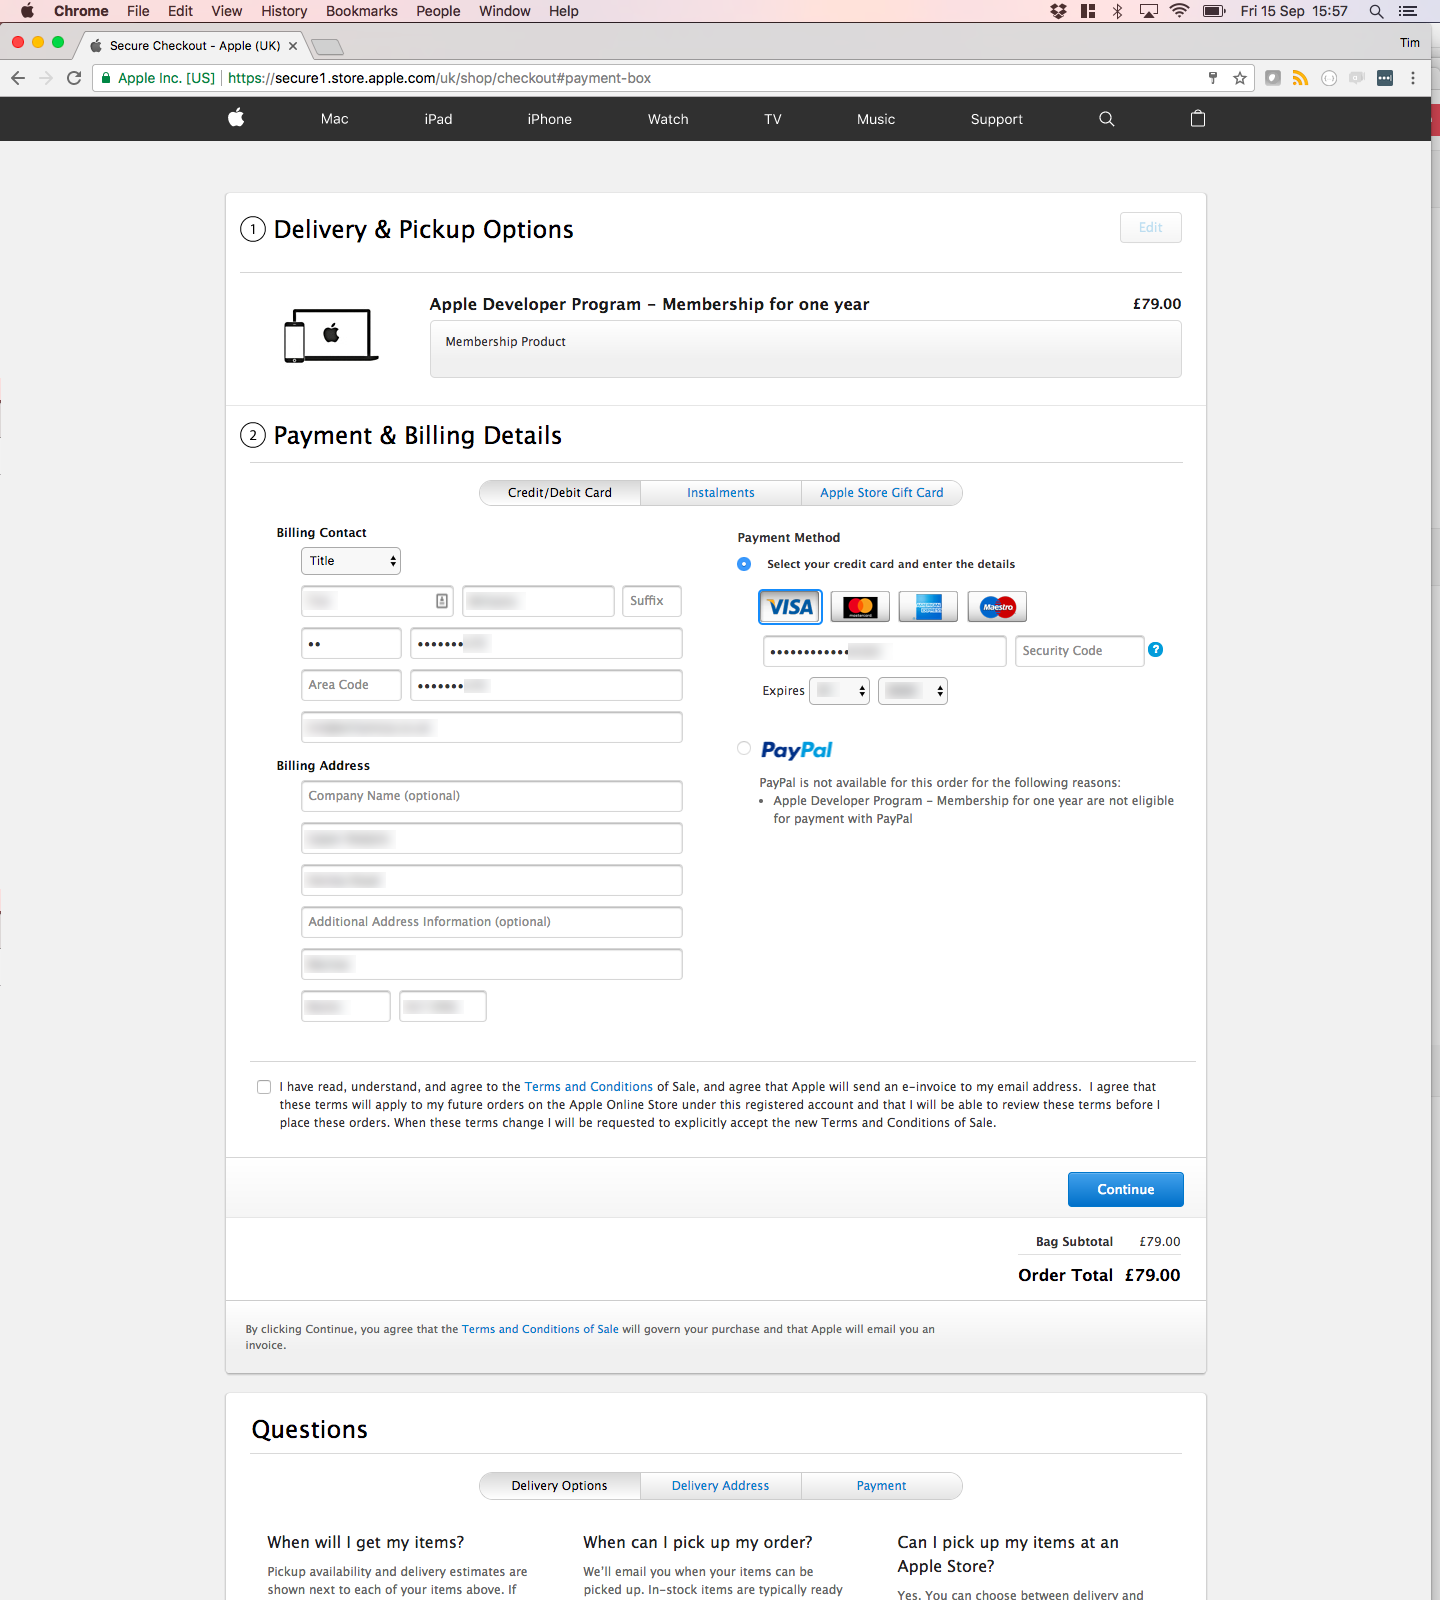
Next review your payment details and when you’re happy, click “Place Order Now“.
You’ll receive a confirmation page:
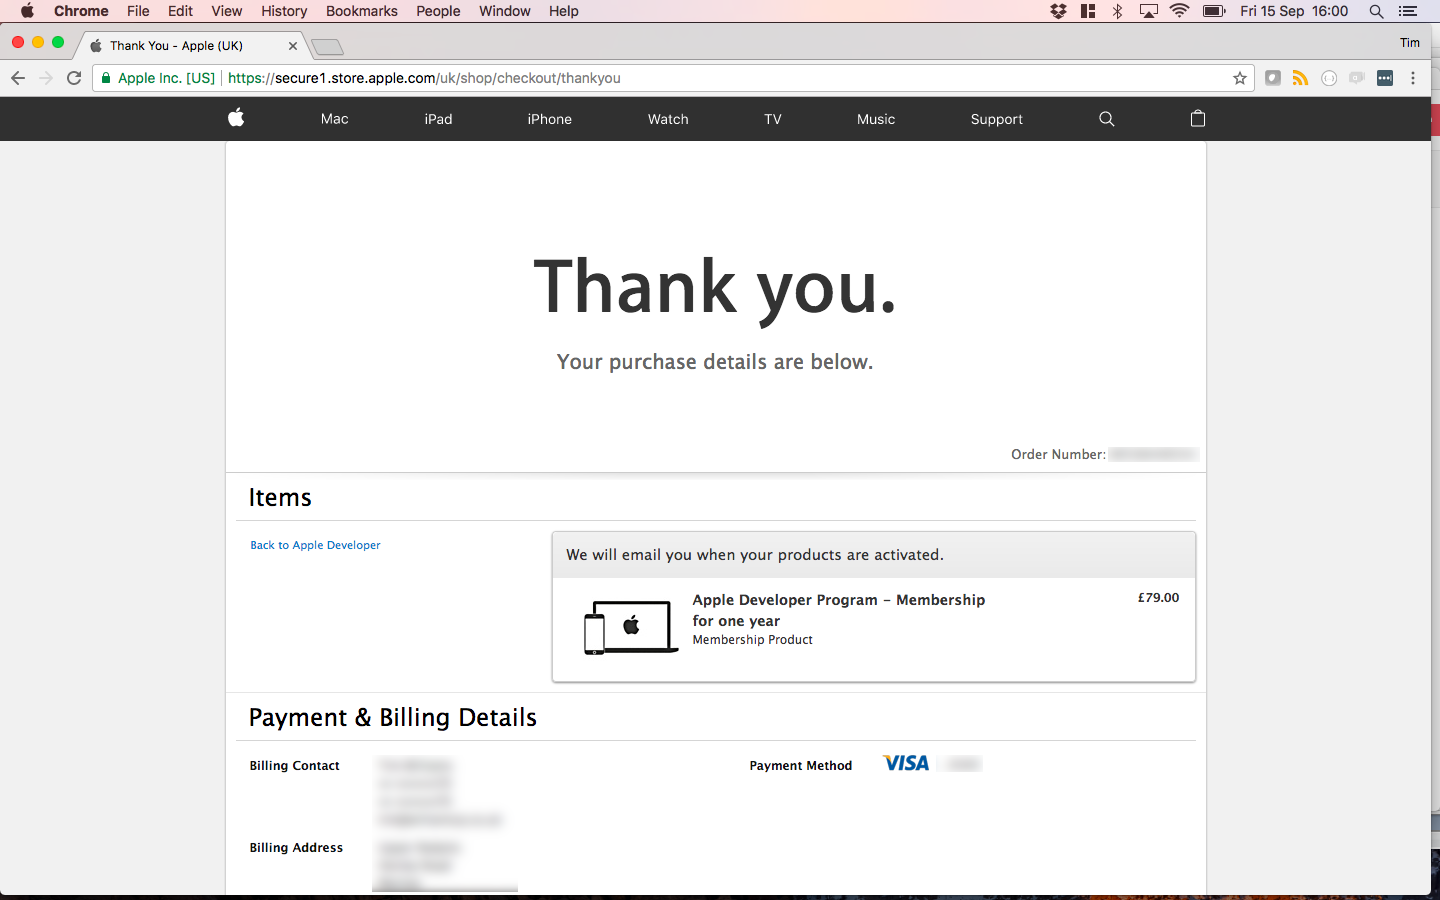
Wait for your Payment Confirmation email
Next you need to wait for email from Apple confirming your payment. This may only take a few minutes.
There will be several emails, the important one is this one:
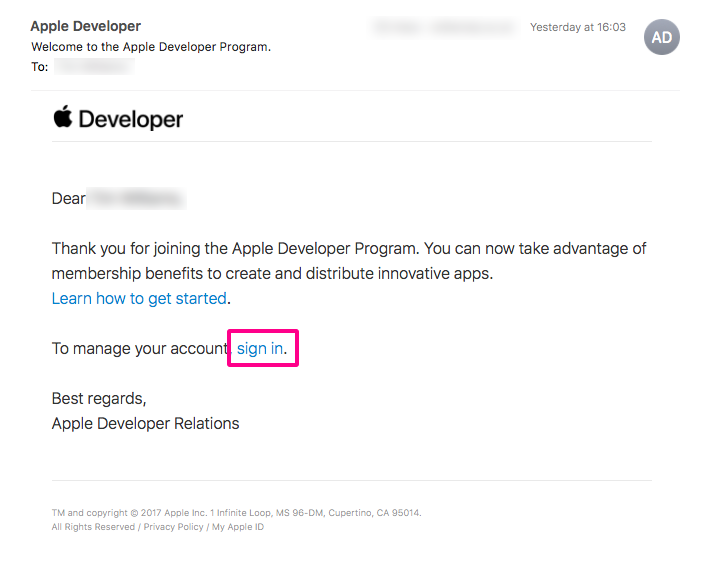
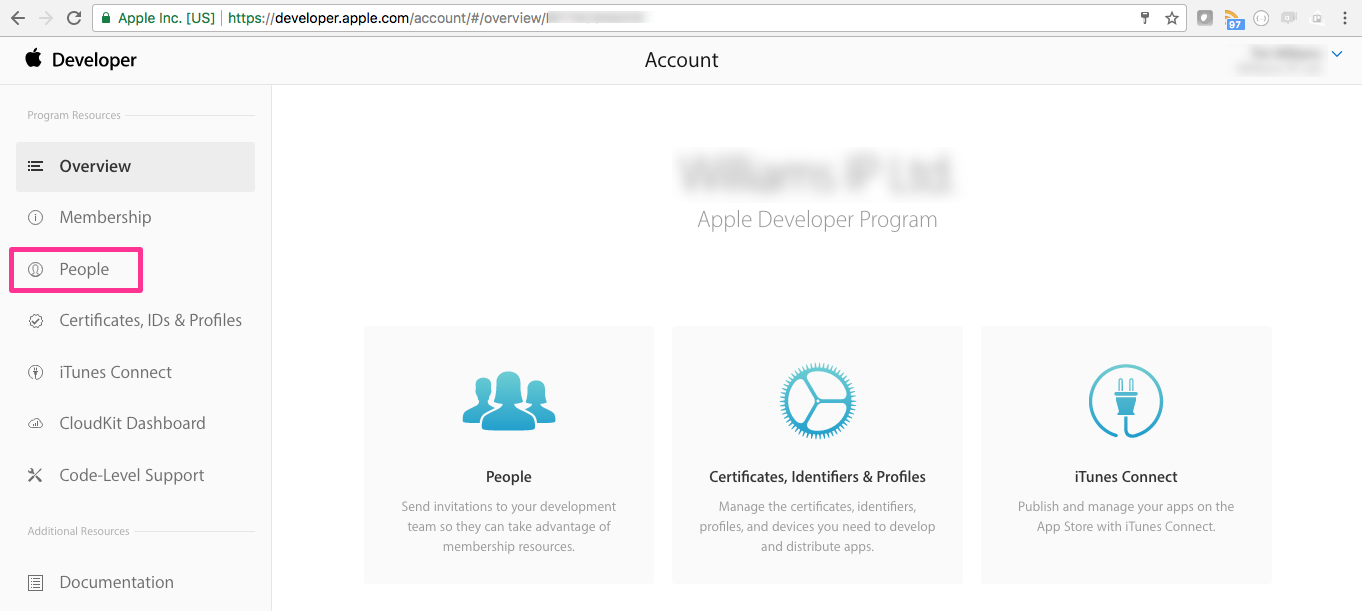
Step 9: Invite us to your Developer Account
Click on the link in the email to login to your Apple Developer account using your AppleID — or you can do this anytime by clicking on https://developer.apple.com
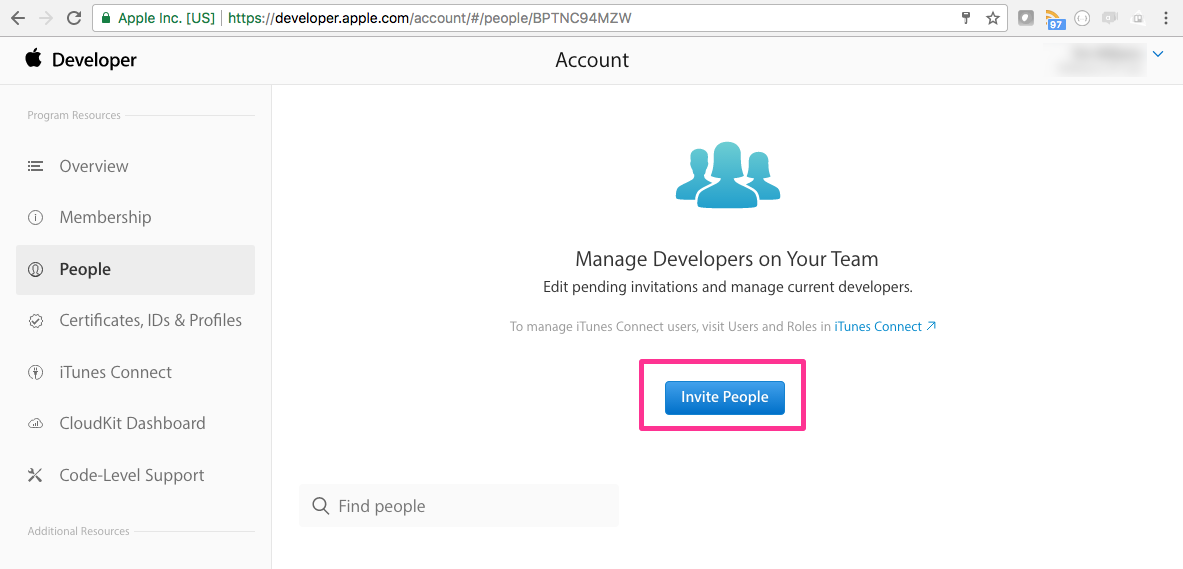
Select the People tab
Click “Invite People“
Invite the email address dev@app-ci.com which the email address we’re using to manage accounts, and click “Invite“.
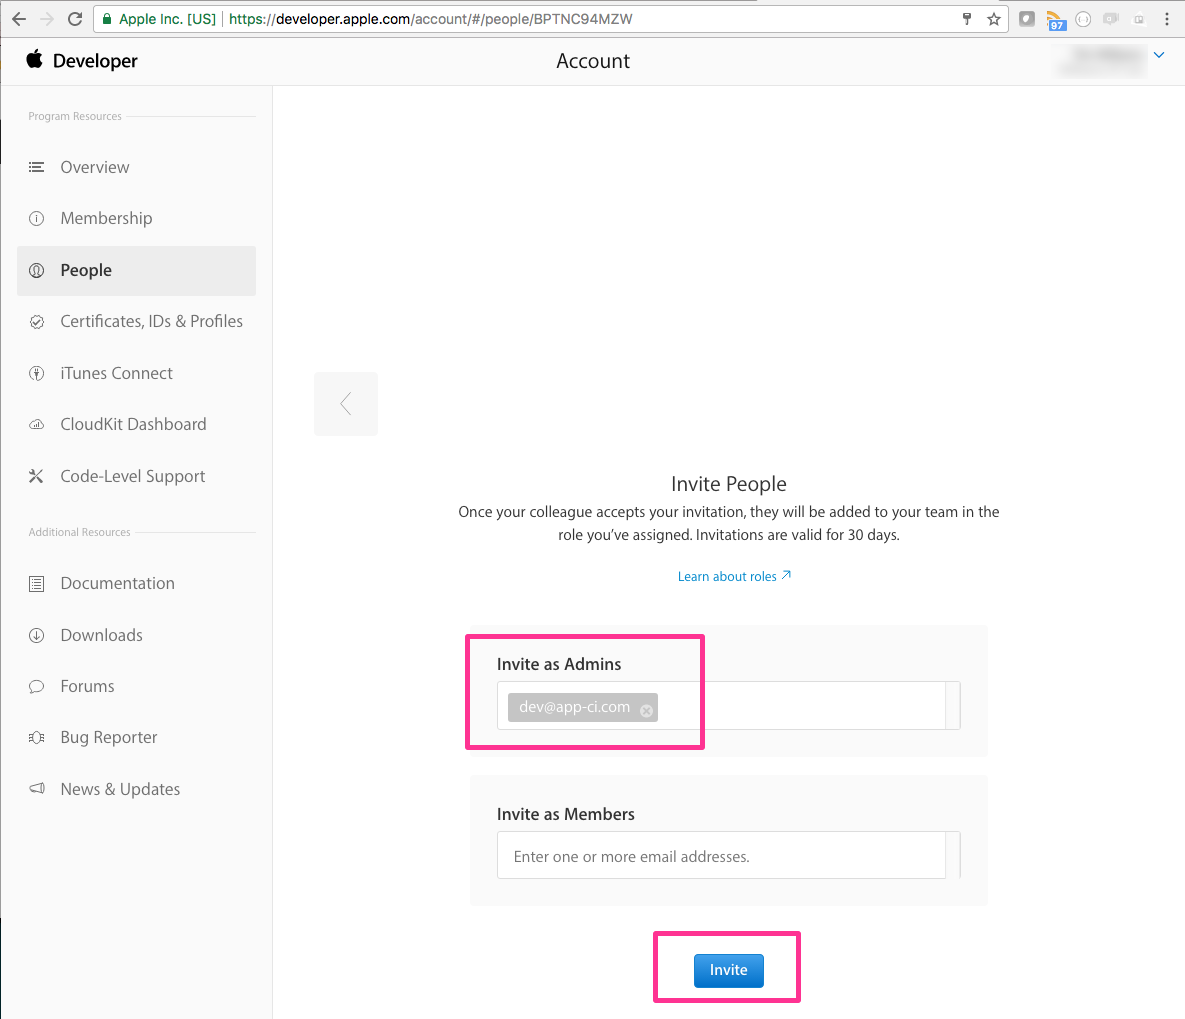
You should see a confirmation page similar to this confirming that you have successfully invited dev@app-ci.com

We’ll will get an email and we’ll now be able to log in to your Apple Developer account.
Next step…
Step 10: Invite us to iTunes Connect
Go to iTunes Connect by clicking on this link https://itunesconnect.apple.com/
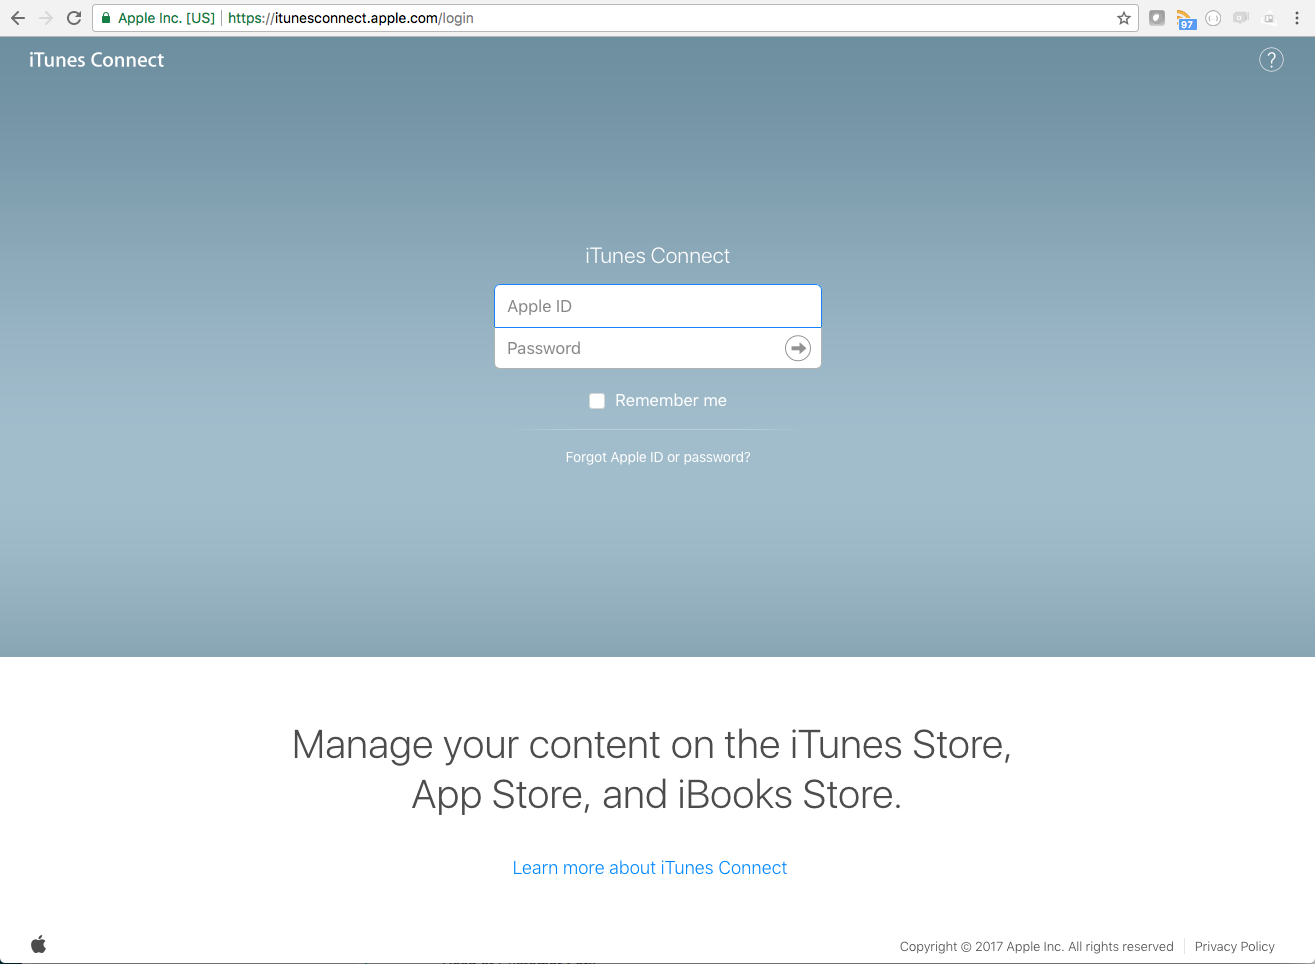
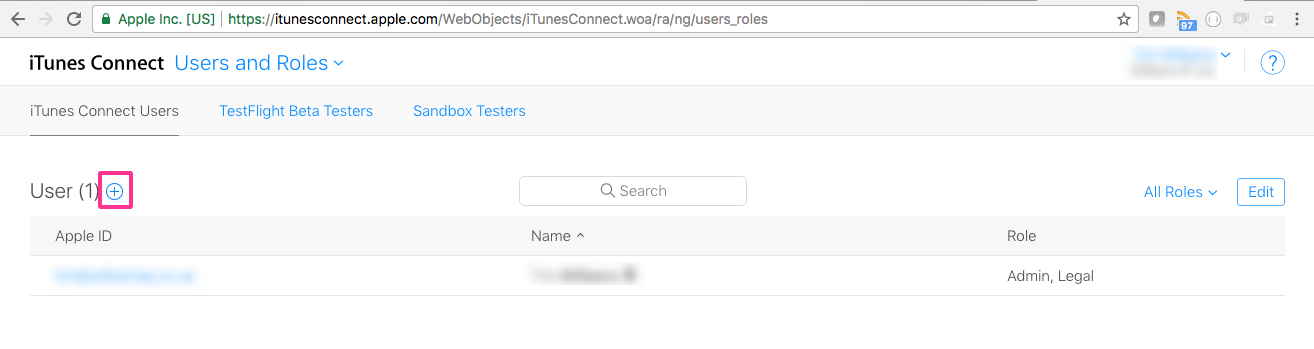
Log in with your AppleID. You may be asked to read and accept the Terms of Service. Once you do, click on Users and Roles.
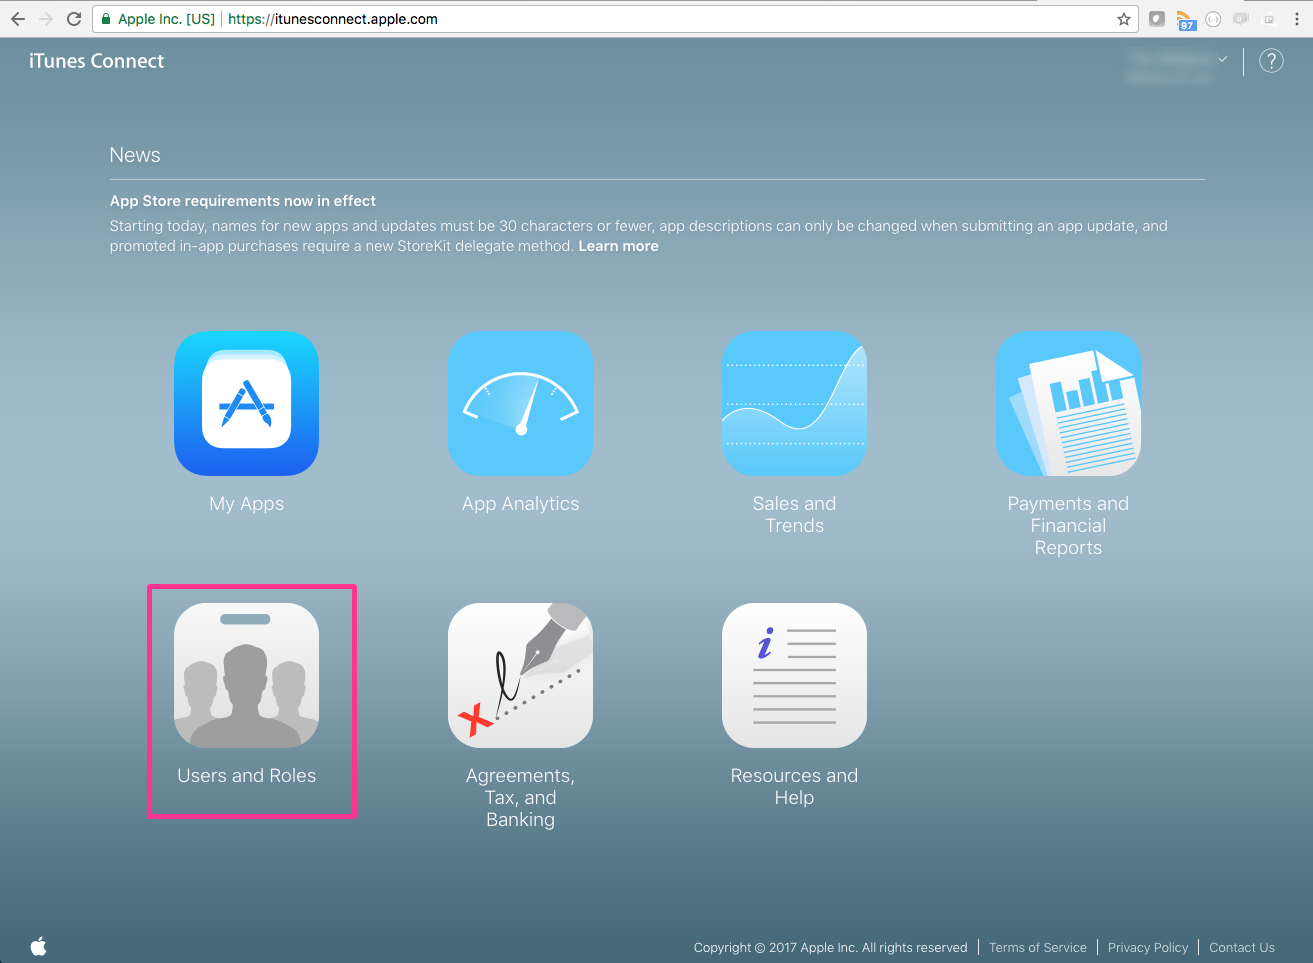
Click on ‘+‘ to add a new user:
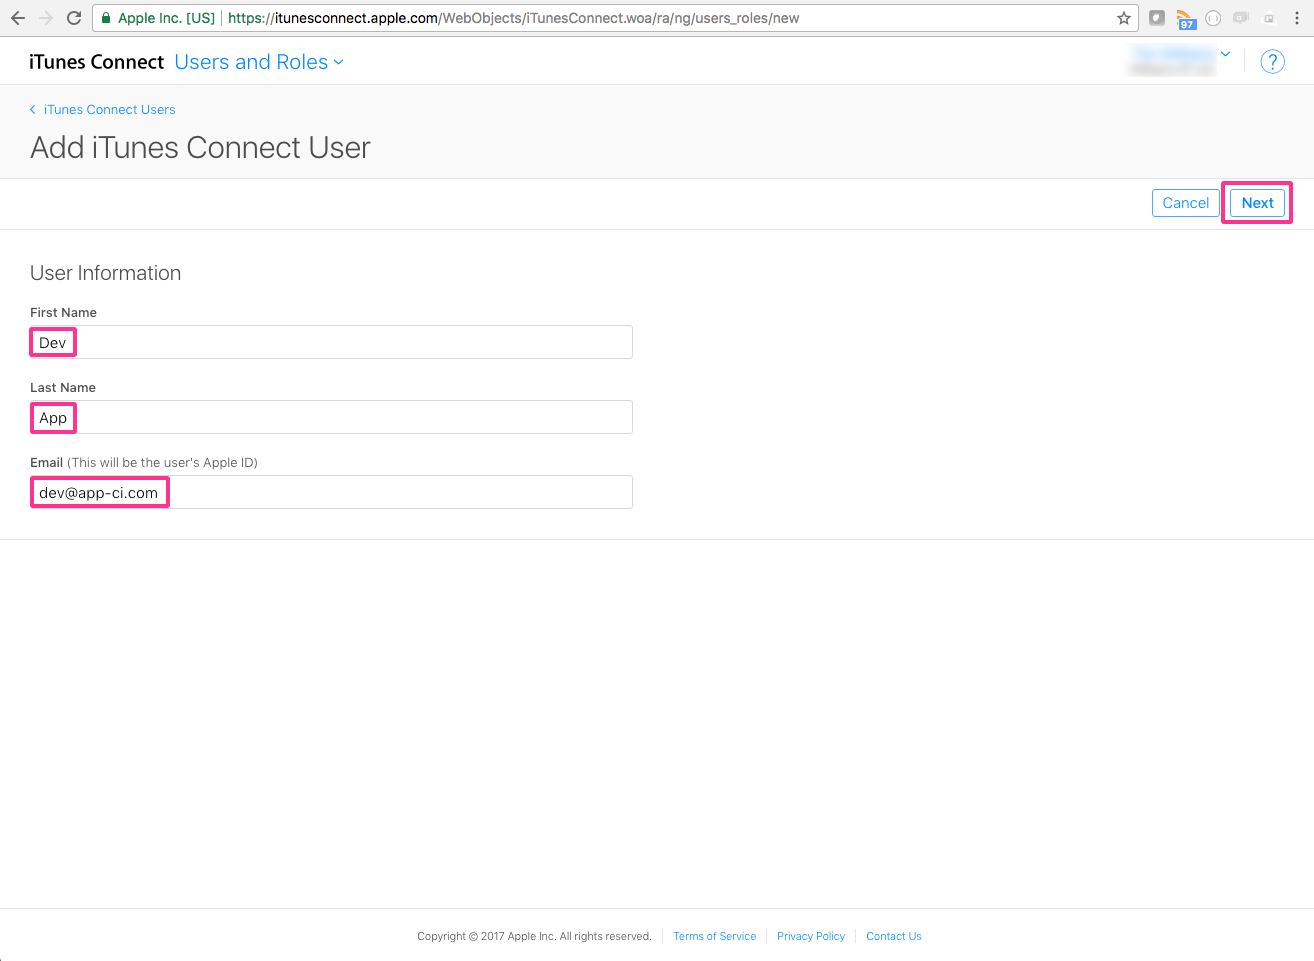
Fill in the new User’s details as follows:
- First Name – Dev
- Last Name – App
- Email – dev@app-ci.com
Then click Next
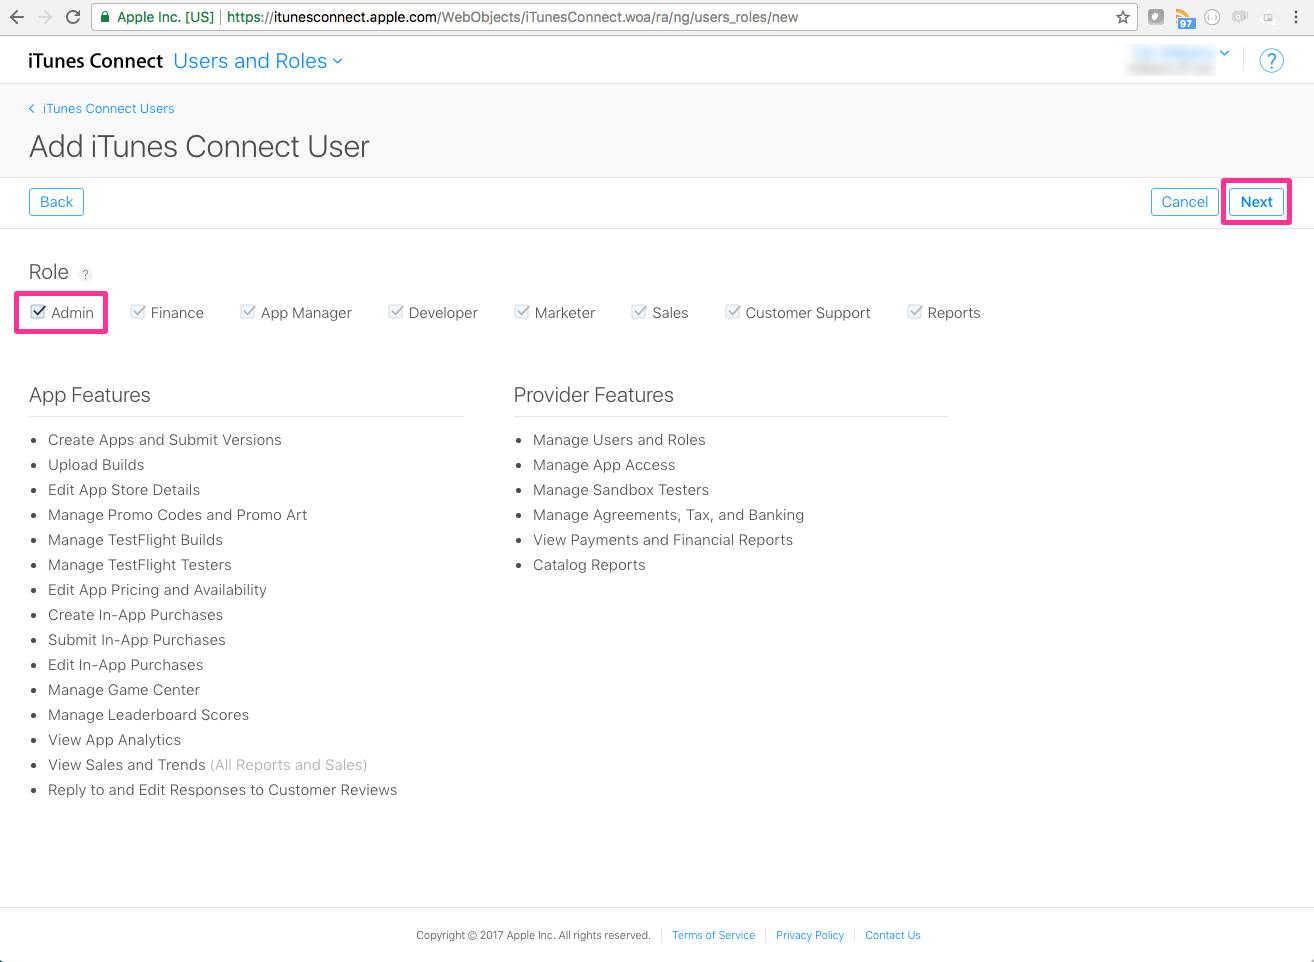
Select a role of Admin and then click Next:
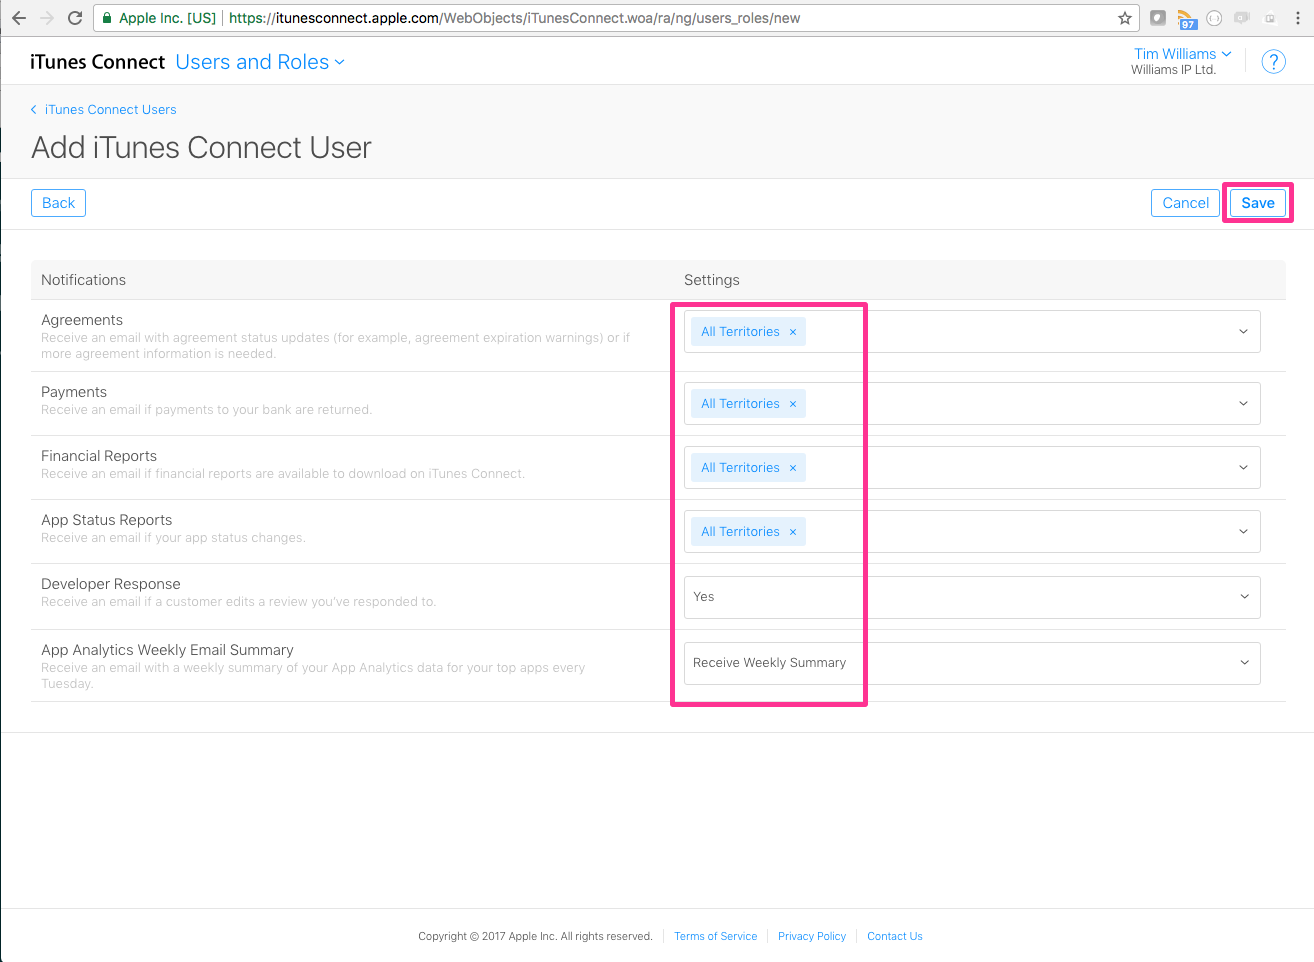
Make the selections shown below for Notifications — this allow Innovatise to see any alerts from Apple that may affect your app. Then click Save
You should see the following confirmation page. We will again receive an email informing us we can access your iTunes Connect account.
At this point please email us to let us know you’ve completed this step.
We will then go and transfer your app from our Apple Account to yours. In the final step, you’ll confirm the transfer…

Step 11: Confirm the App Transfer
Once we’ve initiated the transfer of your app from our account to yours, we’ll notify you by email. To confirm the app transfer, please go to iTunes Connect by clicking on this link https://itunesconnect.apple.com/
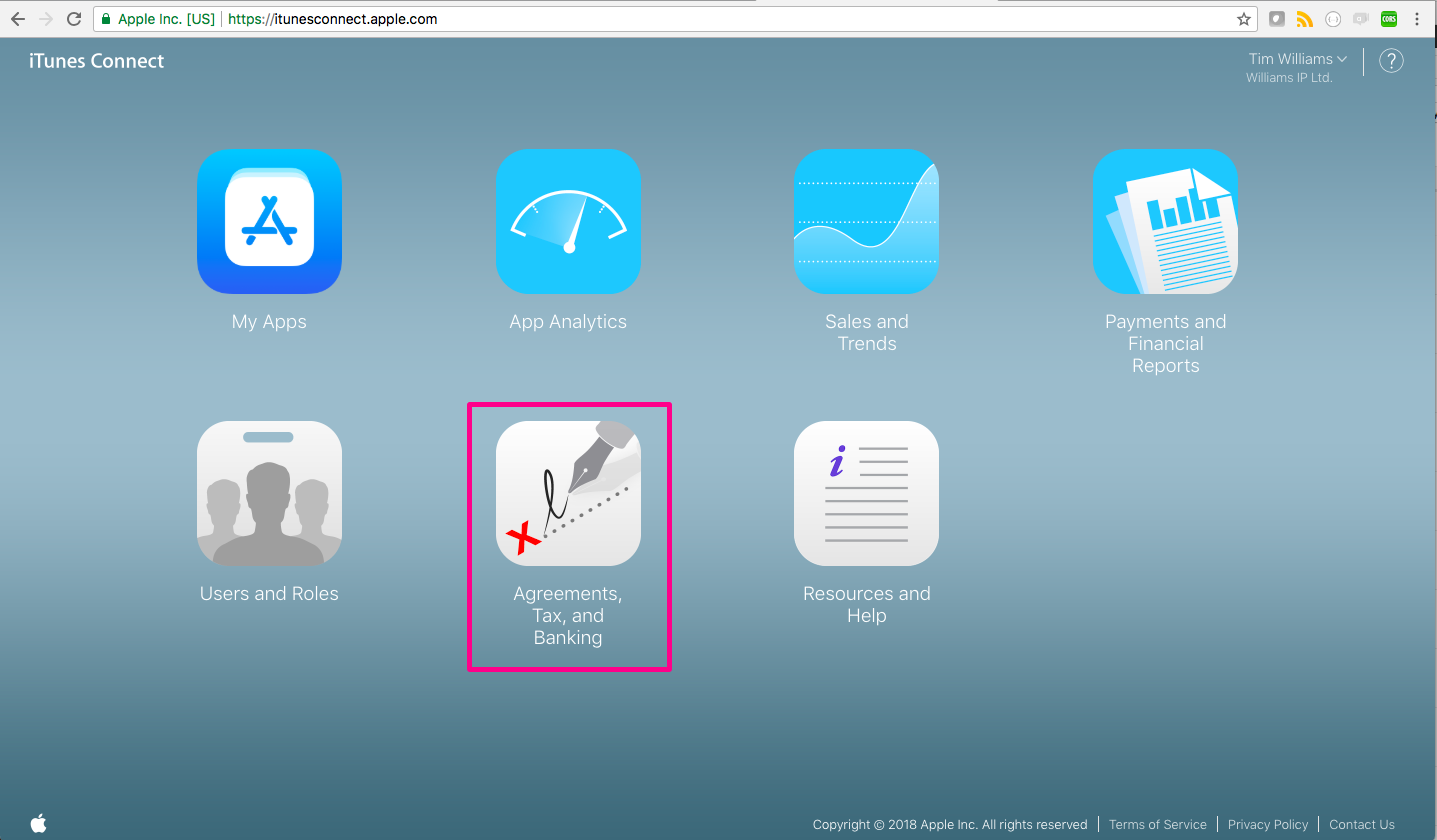
Log in with your AppleID and click on Agreements, Tax, and Banking.
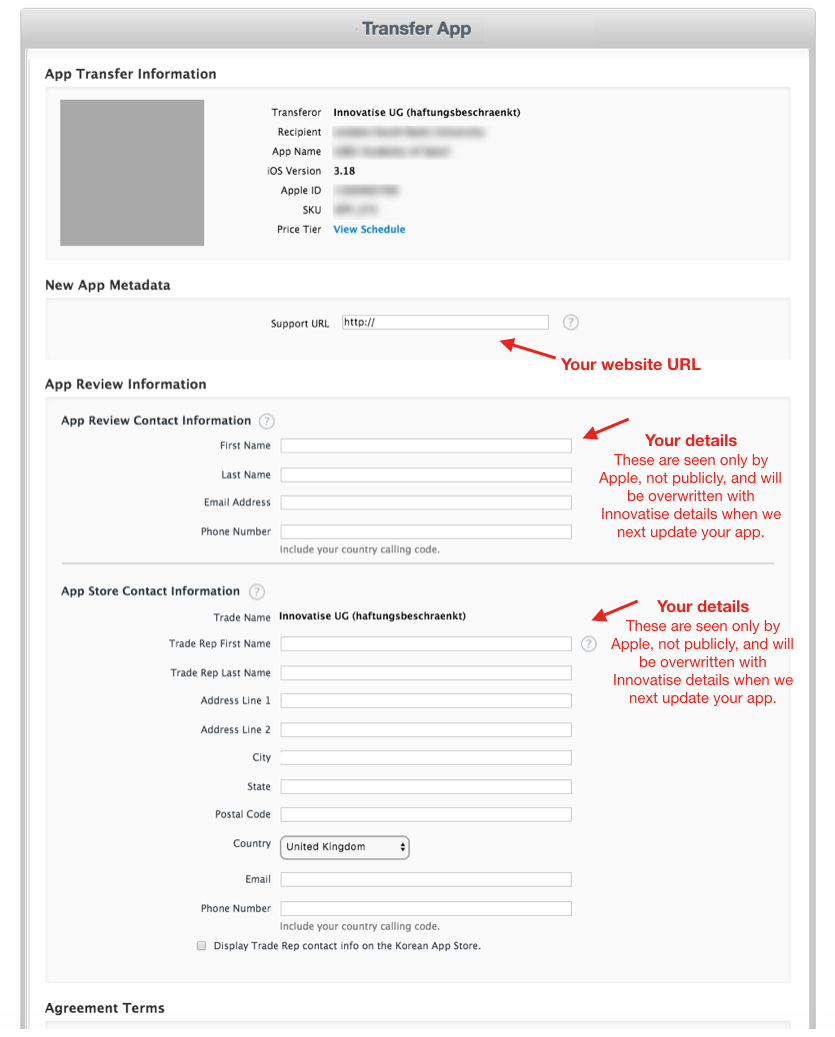
Below Transfer Agreements, click Review next to the app in the Contracts In Process section.

Enter your Support URL and Contact Information
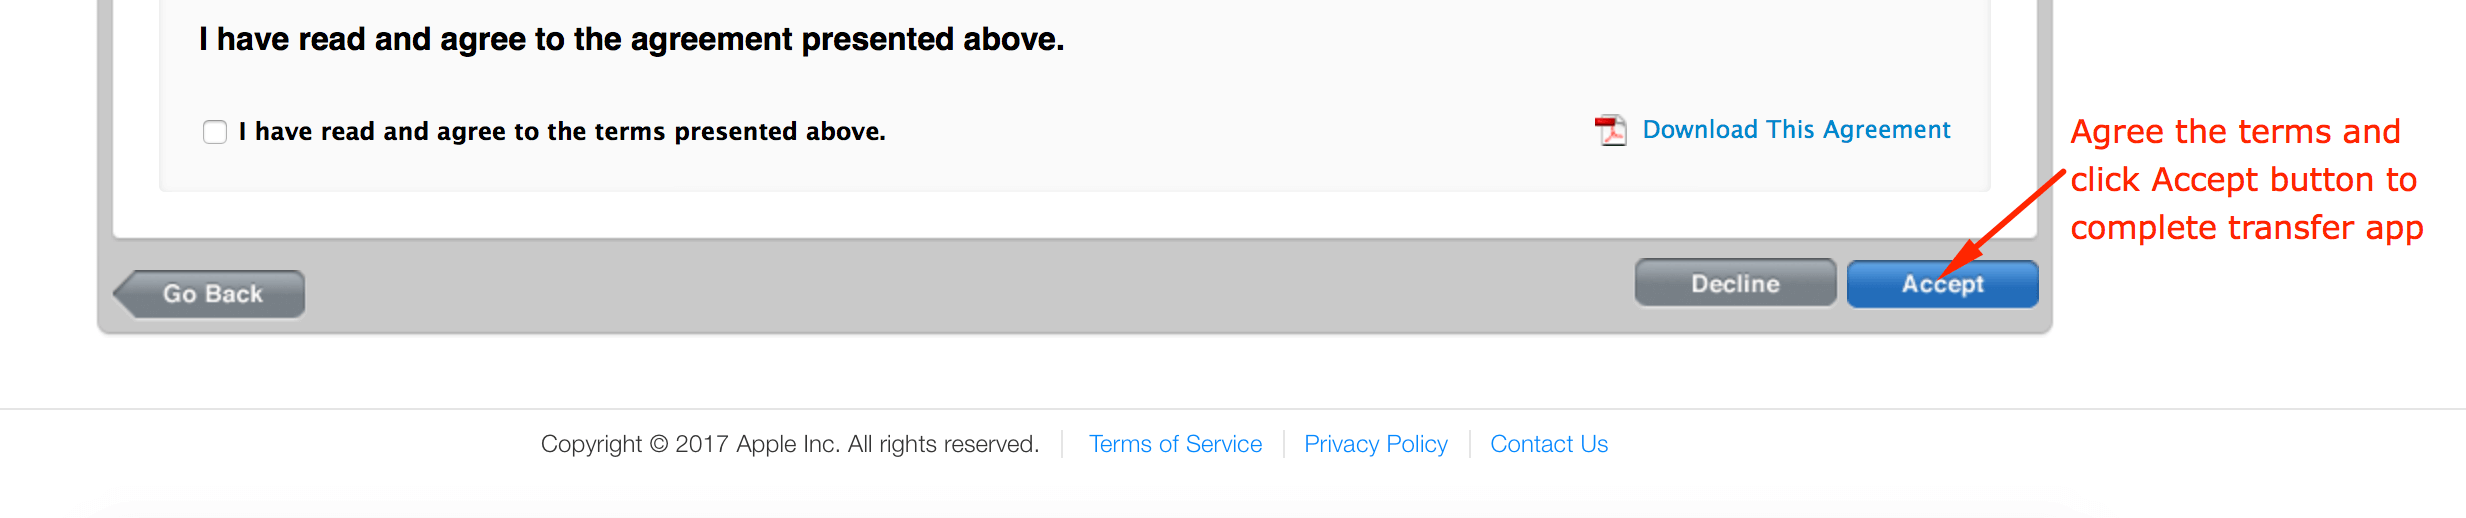
Click the checkbox and then click Accept
Congratulations – you made it!
It can take up to two business days for the app transfer to complete, during which the app status is Processing App Transfer.
During this time, your app will work as usual and your app users won’t see any changes.
Once you’ve reached this stage
- Your app will shortly appear in your Apple Developer account (within 2 days)
- We should have all the access we require, subject to Apple approval, to maintain and update your app
- You’ll see notifications from Apple concerning your account. Some of these will be triggered when we make changes to your app, no action required from you. Others will relate to changes in Apple Ts&Cs or subscription renewals, please don’t ignore these !
Thanks for your patience and persistence !

ABOUT US
Innovatise is a pioneer in mobile marketing and the creator of myFitApp, an open, flexible, independent and digital marketing platform for the fitness industry. Gyms and Health Clubs use myFitApp to strengthen their brand, retain members, attract new ones and increase sales with the unique power of mobile.
COMPANY
Innovatise was founded in 2011 and was added to the Clubessential Holdings portfolio of companies in 2022.
APP STORES:


innovatise GmbH © 2011 - 2024